Nothing frustrates me more than repetitive tasks. My working environment is as automated as possible: aliases, shortcuts, macros, and productivity tools. The same frustration extends to my development environment. I want to write code and build features and even tests *rolls eyes*. And I don’t want to manually run those tests or the other checks we use to validate our code or the myriad of tools we use to make development easier.
The easiest way to avoid manual repetition when developing is by automating it away. The movement towards CI/CD (Continuous Integration/Continuous Deployment) has resulted in a deluge of tools and services that manage everything from test runs to code coverage analysis to artifact generation and distribution.
One of those services, GitHub Actions, is built right into your GitHub repository. Let’s use Actions to add some initial automations to a repository. To begin, we’ll automatically trigger our test runs when we open a pull request and automatically build a Docker image for your application.
We'll be using a sample application I’ve created called Animal Farm. It’s a small NodeJS application that runs an Express server. You’ll need Node.js and Yarn as prerequisites for the application.
Start by cloning that repository and taking a look at it.
git clone https://github.com/jamtur01/animal-farm-nodejs.git
cd animal-node-nodejs
We can then use yarn to install the required Node.js modules.
yarn install
Then use yarn again to start the application.
yarn start
yarn run v1.19.1
node app.js
Launching server on http://localhost:8080
It’ll run on localhost on port 8080, and we can browse to see its output.
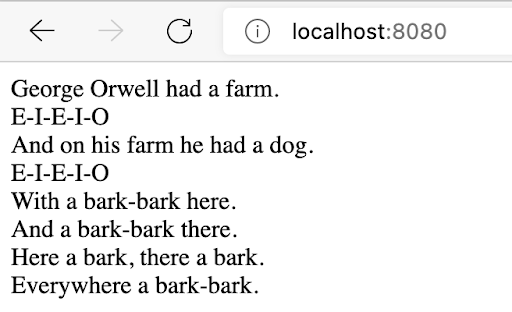
You can refresh a few times to see what other animals are on the farm. We can also query an API endpoint.
curl localhost:8080/api
{"cat":"meow","dog":"bark","eel":"hiss","bear":"roar","frog":"croak"}
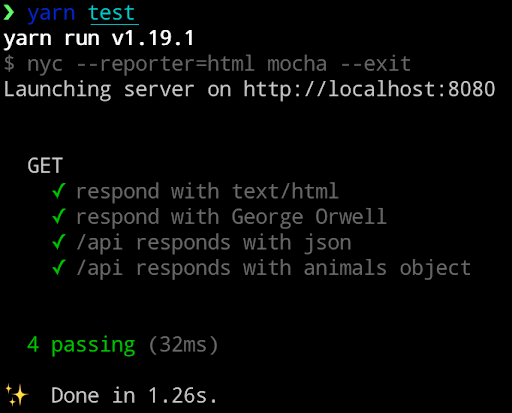
We also have a not-very-comprehensive test suite for our application located in the test directory. Let's run this with yarn.
Adding our first workflow
All GitHub repositories come with Actions enabled by default. Browse to your repository, and you’ll see a tab labeled Actions. All you need to do is tell your repository to make use of Actions in your development process.
Actions run workflows, which are usually associated with specific stages in your development process, for example, a workflow that runs when a pull request opens. Inside workflows are jobs—the individual steps in a workflow. For example:
Workflow #1
Clone the repository
Install the prerequisites
Run the tests
These workflows, and the jobs inside them, are defined in YAML-formatted files inside your repository in a directory called .github/workflows. Let’s start by adding this directory inside our repo.
mkdir -p .github/workflows
cd .github/workflows
Testing our code with a workflow
Let’s create a workflow to run our tests when we open a new pull request. We create a YAML file to hold this workflow.
NOTE: The YAML file format can be fiddly to get right. If you want to check if your YAML file is valid, you can use this handy validator.
touch test.yml
And then add our Actions configuration to this file:
yaml
name: Animal Farm NodeJS CI
on:
push:
branches:
- main
pull_request:
branches:
- main
jobs:
build:
runs-on: ubuntu-latest
steps:
- name: Checkout repository
uses: actions/checkout@v2
- name: Use Node.js
uses: actions/setup-node@v1
with:
node-version: '18.x'
- name: Run Yarn
run: yarn
- name: Run tests
run: yarn test
You can see our workflow has a descriptive name: Animal Farm Node.js CI. We next want to define when our workflow runs. We do this in the `on` block. We’ve specified two conditions, both qualified with a specific branch: main.
Push - action will trigger if someone pushes to the main branch
Pull request - action will trigger if someone opens a pull request from the main branch.
You can also configure the on block to trigger for other events, such as when a release publishes or on a regular schedule.
Below the on block is the jobs block, this contains the jobs to be executed by this workflow. We’ve got one job defined: build. Each job runs on a specific platform. You can currently choose from Linux, Windows, and macOS. In our case, we’re running our job on a container using Ubuntu Linux.
Every job has steps. These are the tasks the job will execute. If one step fails, then generally, the whole job will fail. For our purposes, we want to make sure the last step, which runs our tests, passes before we merge our pull request.
We’ve named each step we’re taking. The first step, called Checkout repository, checks out the current repository. In any job, you’ll usually need to do this as the first step, or at least one of the first steps. It makes use of a pre-packaged action: actions/checkout@v2. Prepackaged actions are provided by GitHub or community members and usually perform tasks that might otherwise use multiple steps or represent repetitive configuration. Here our actions/checkout basically performs a local git clone of the repository. You can usually pass options to the pre-packaged action to specify how it’ll execute that task.
Similarly, our second step, called Use Node.js, runs another prepackaged action: actions/setup-node@v1. This action takes care of installing Node.js inside the container running our job. We can see one of the action arguments here too. The with block tells Actions what Node.js version to install—in our case, the latest version in the 18.x release.
Our last two steps are at the heart of our job. The next step runs yarn to install any Node.js modules we need. The last step executes our tests using yarn tests. Let’s see it in action.
We’re going to make a change to our app and then create a pull request for it.
git checkout -b feat-newanimal
Switched to a new branch 'feat-newanimal'
We’ve then edited app.js and updated our bear to growl and added a new animal, a lion who roars, to our animals object, committed the result, and pushed it to our repository.
git add app.js
git commit -a -m “Added a roaring lion”
git push origin feat-newanimal
We can then create a pull request for this branch. After the request has been created, Actions will initiate our testing workflow. This test is lucky for us because we forgot to update our app’s tests. We can see in our pull request that we have a failed Actions run because our tests failed. We can even prevent someone from merging this branch until the tests pass and all our Actions are green.
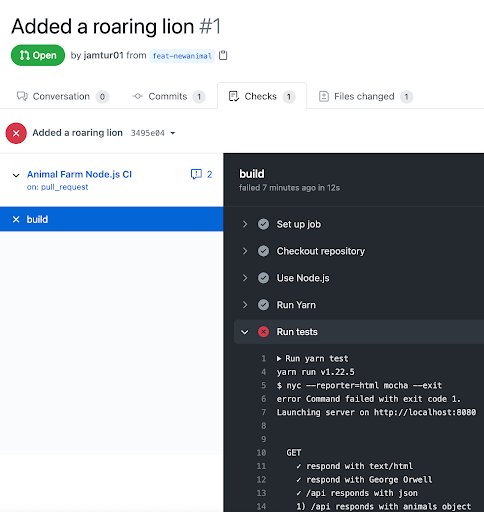
Now we can go back and update our test, which will re-run our Github Action, this time resulting in a successful run.
A workflow for building Docker images
Finally, we want to update our application’s Docker image and push it to the GitHub Container Registry and the Docker Hub. Let’s create a second workflow to do this.
cd .github/workflows
touch docker.yml
And populate this file.
yaml
name: Publish Docker image
on:
push:
branches:
- main
jobs:
build-and-push:
runs-on: ubuntu-latest
steps:
-
name: Checkout
uses: actions/checkout@v2
-
name: Set up QEMU
uses: docker/setup-qemu-action@v1
-
name: Set up Docker Buildx
uses: docker/setup-buildx-action@v1
-
name: Login to DockerHub
uses: docker/login-action@v1
with:
username: ${{ secrets.DOCKERHUB_USERNAME }}
password: ${{ secrets.DOCKERHUB_TOKEN }}
-
name: Login to GitHub Container Registry
uses: docker/login-action@v1
with:
registry: ghcr.io
username: ${{ github.repository_owner }}
password: ${{ secrets.GHRC_TOKEN }}
-
name: Build and push
uses: docker/build-push-action@v2
with:
context: .
file: ./Dockerfile
push: true
tags: |
jamtur01/animal-farm-nodejs:latest
ghcr.io/jamtur01/animal-farm-nodejs:latest
We’ve named our new workflow: Publish Docker image. This time, our on block only triggers when we merge to the main branch. We have one job in our workflow called build-and-push that runs on ubuntu-latest. Our job checks out our source code using the checkout action we used in our last workflow. It then uses some new pre-packaged actions to set up a Docker build environment using QEMU and Docker buildx.
We use another Action to login to both the GitHub Container Registry and Docker Hub. In these steps, we can see a new construct: variables.
yaml
${{ secrets.DOCKERHUB_USERNAME }}
Actions can use variables to customize our workflows and input external data. These can include secrets, like our Docker Hub username and password, or environment variables like our path, or user-specified values. We’re using a secret, which we can add as a value in our repository settings or, if you’re working within an organization, to the organization. These values are encrypted and open decrypted when being used during our workflow’s execution. We’ve used them to provide credentials to log in to the registries we want to store our Docker image.
NOTE: Variables also allow us to create “matrix” builds. These builds allow us to run multiple iterations of a workflow using specific values as iterators, for example, running our tests against multiple versions of Node.js or on multiple operating systems.
Lastly, our workflow builds the new Docker image using the Dockerfile from our repository and pushes the built image to both the Docker Hub and GitHub Container Registry.
Let’s merge our PR. The merge will trigger two workflows. The first workflow runs our tests to confirm that the new main branch is working correctly. Our second workflow is the Docker build and push.
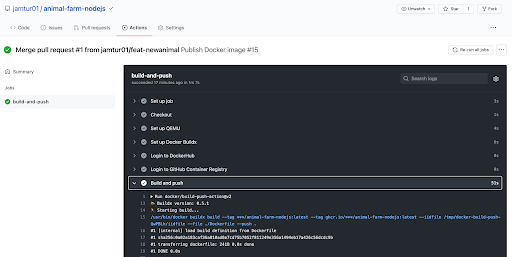
And it’s a success! The new animal is added to our application, and folks can run an updated Docker image.
This post just scratches the surface of what you can automate with Github Actions. I use Actions for running tests, linting and style checks, checking code coverage, building artifacts, and new releases. It both catches any issues I might have missed and removes the need to run manual processes, allowing me to focus on adding cool features.


